VLANs are a great way to segment your network and add security to your homelab. In this step-by-step guide, I will show you how I was able to configure a VLAN for my homelab.
Hardware
I am using the following hardware in this tutorial. Feel free to follow along, but if you are using different devices, your mileage may vary.
Configuring the VLAN on the Switch
Step 1: Configure the VLAN
Visit the URL of your Switch. For me, this is http://192.168.1.69/login
Sign in and go to the Configure Tab
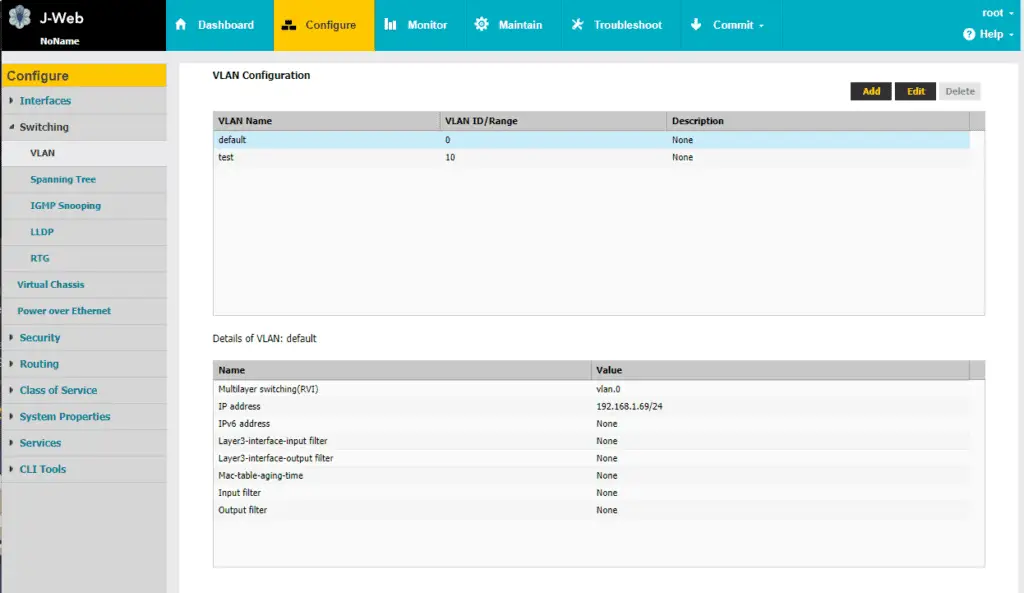
Go to Switching > VLAN and click on the Add Button at the top right.
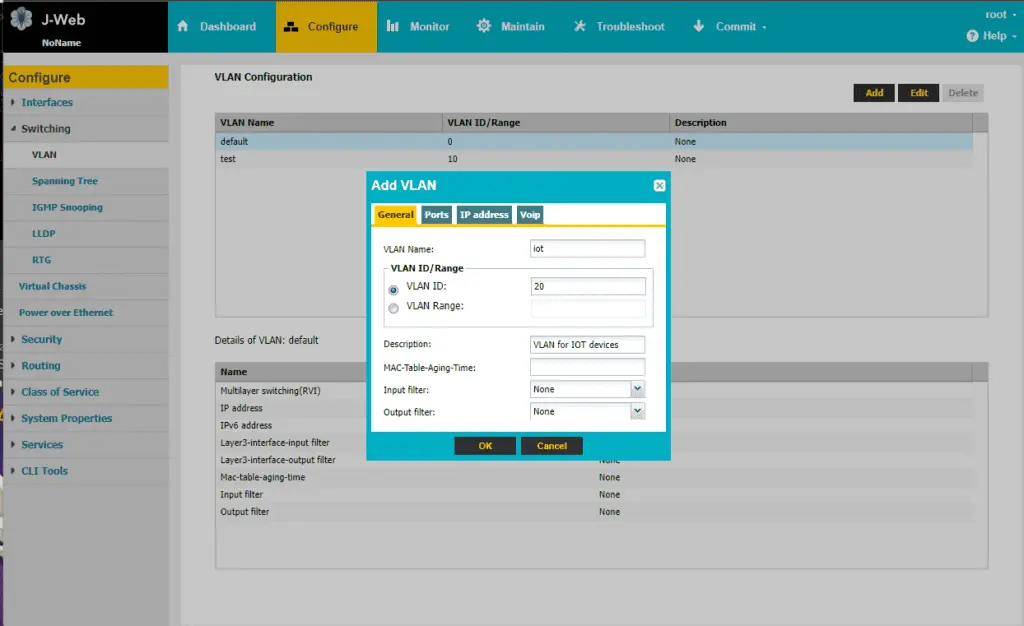
Fill in the desired VLAN name and description.
Note: You won’t be able to change the name later on but you can delete and recreate it
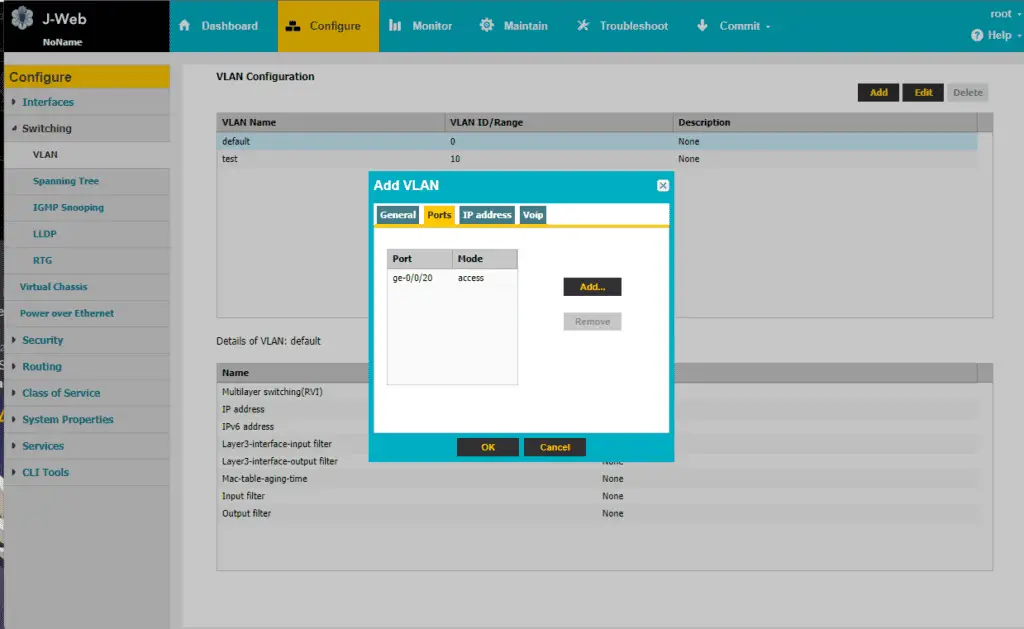
In the Ports tab, you can add the ports you want to be associated with this VLAN. You can view the ports in the Dashboard of J-Web if you forget.
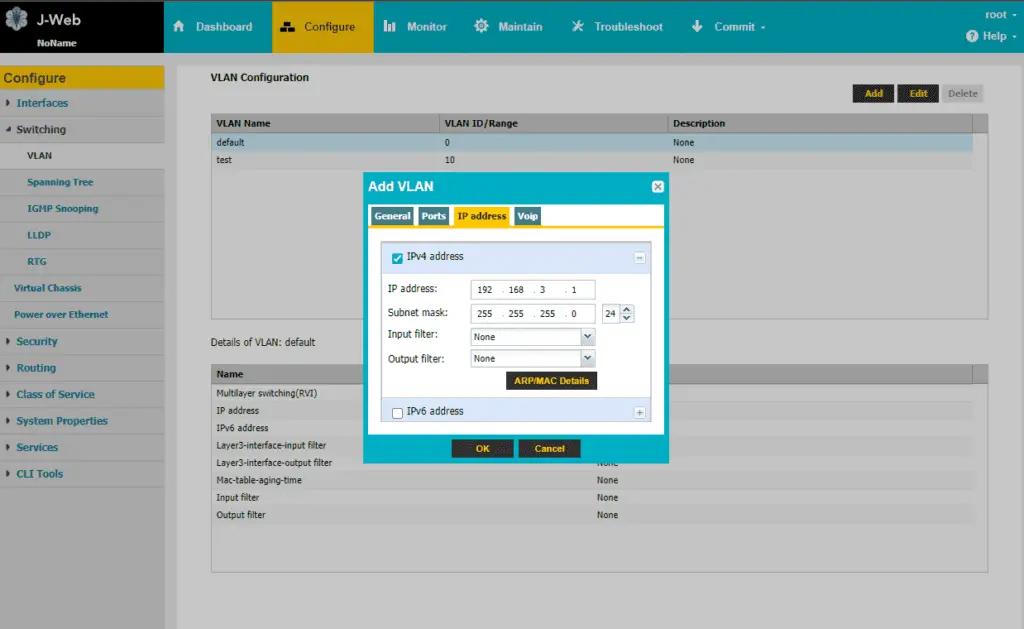
In the IP address Tab, Check IPv4 and fill in the desired IP address of the VLAN gateway and the subnet.
Once you are happy with the changes, click OK.
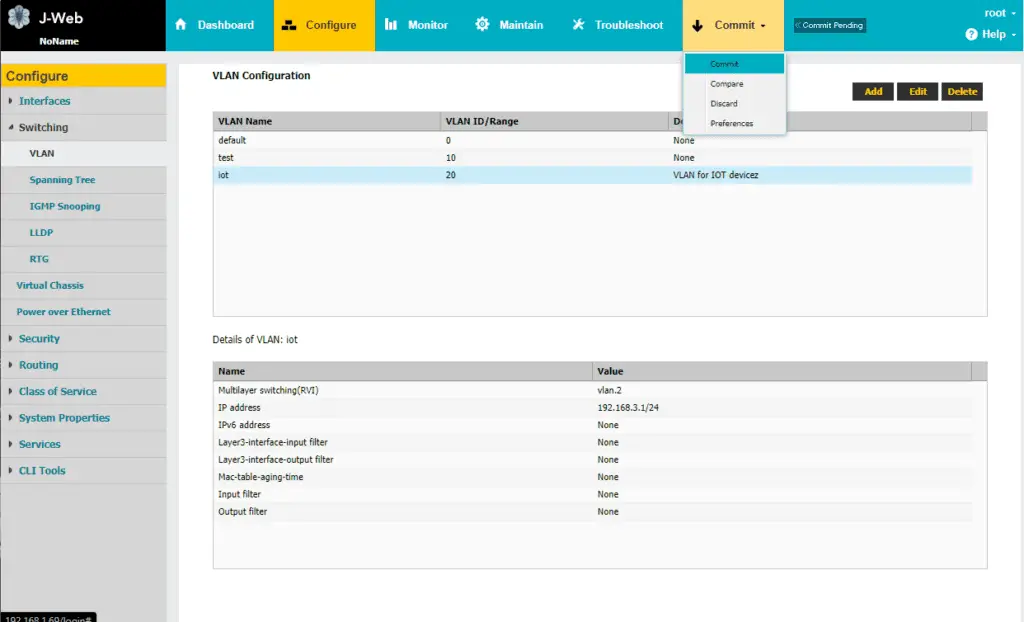
You can now Commit your changes at the top Commit Tab
Step 2: Add DHCP for the VLAN
Configuring DHCP will allow devices to automatically be assigned IP Addresses
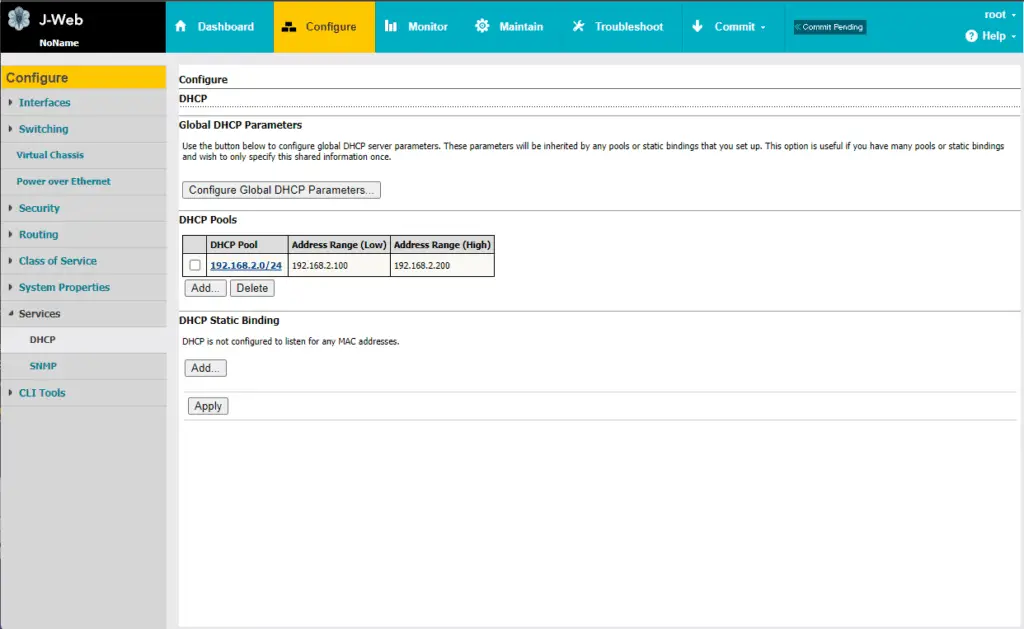
Go to the Configure > Services > DHCP tab and Add a DHCP Pool
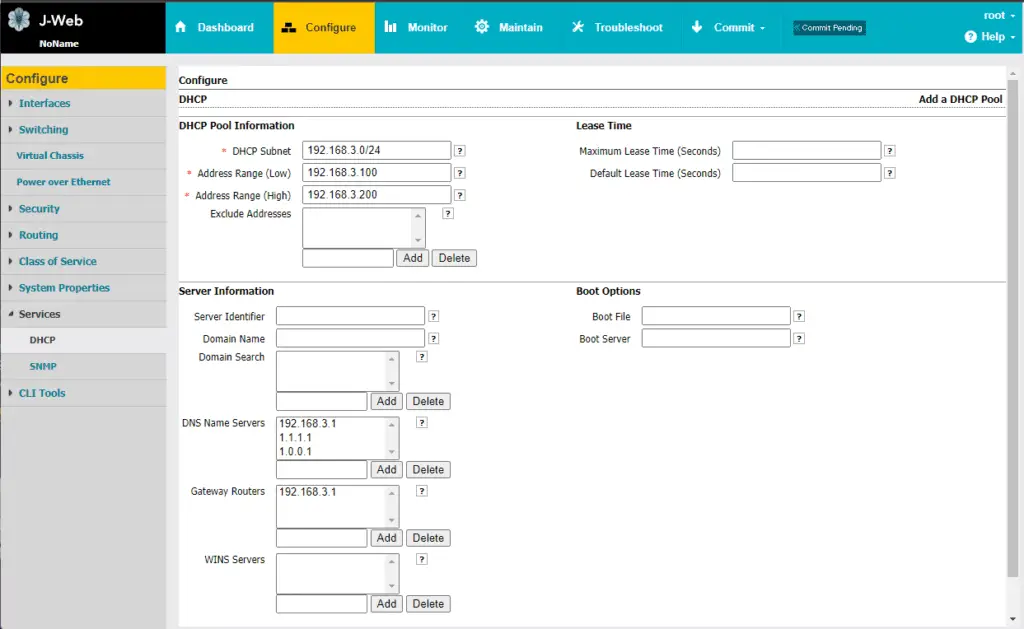
Fill in the DHCP Subnet and the Address Range you would like to automatically assign.
For DNS Name Servers, these are the default DNS servers that connected devices will use. I added the VLAN Gateway (192.168.3.1) as well as Cloudflare’s DNS Servers (1.1.1.1 and 1.0.0.1)
For Gateway Routers, this is the default gateway that devices on the VLAN will use. (192.168.3.1)
Once you are happy with the changes, click on OK and commit the changes like above in Step 1.
Configuring the VLAN Routing on the Router
Now that we have the VLAN setup and ready, we need to create a new route so that we can have Internet Connectivity for our VLAN.
Go to your Router’s management URL (Default: https://192.168.1.1/) and sign in.
Go to Advanced > Network Settings > Routing Page and configure a new Route
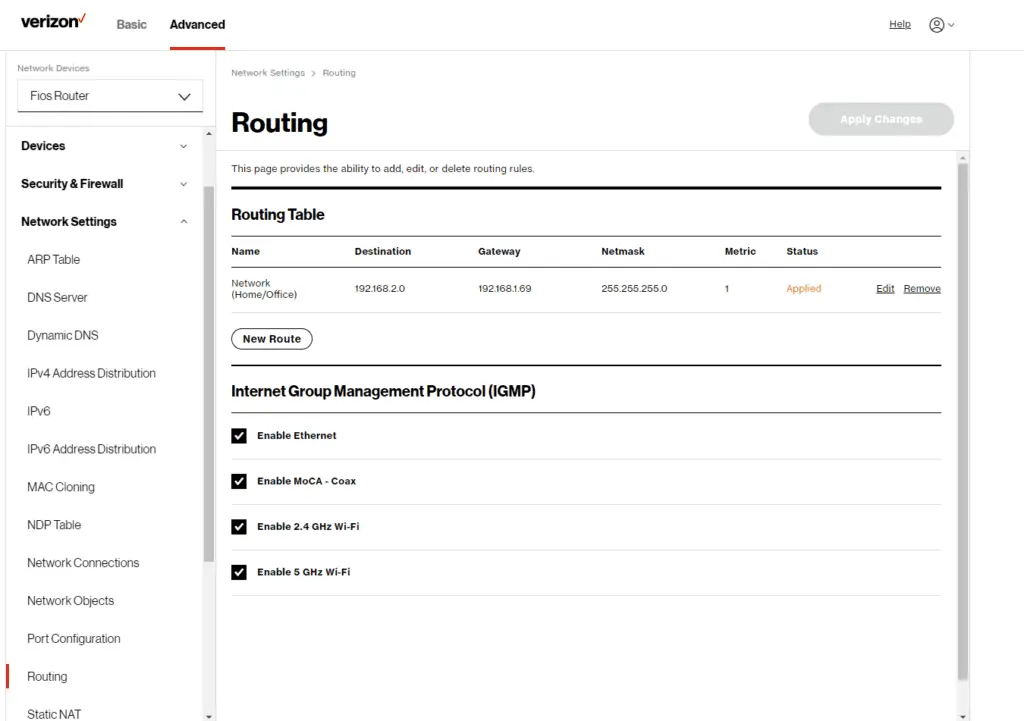
Destination: The VLAN destination IP (192.168.3.0)
Netmask: The VLAN submask (255.255.255.0)
Gateway: The IP of the Switch (192.168.1.69)
Click Apply once you are ready.
That’s it!
We are now finished configuring our VLAN. We can now test it by connecting a device to the port(s) assigned to the VLAN. It should obtain an IP address (192.168.3.100-200) automatically and have internet connectivity.
If you liked this tutorial, please be sure to check out our other Homelab guides.
Thanks for reading and happy hacking!