Whether you are on a different OS and want to try out Windows, or you want another Windows machine for Windows-specific software, a great way to achieve your needs would be to virtualize a Windows 11 Virtual Machine (VM) within Proxmox. This offers a lot of flexibility in having Windows without having to dedicate the extra hardware to host it bare metal.
VM Configuration
General

On this page, we can name our VM and leave the rest default.
OS

On this page, we want to make sure we select the correct ISO image. You can download the Windows 11 ISO for free here: https://www.microsoft.com/software-download/windows11
Then we can select Microsoft Windows as the OS type and select the correct version. In our case, Windows 11.
System

There are a few things we will need to change:
- Machine should be set to q35
- Qemu Agent should be enabled
- BIOS should be set to UEFI
- Add EFI Disk should be checked
- EFI Storage should be set to the storage your VM will be stored on
- Add TPM should be checked
- TPM Storage should be set to the storage your VM will be stored on
- TPM Version should be v2.0
Disks

On this page, we want to make sure our Bus/Device is set to VirtIO Block. we can also set the Storage location and disk size. According to Microsoft, Windows 11 has a minimum requirement of 64 GB, but more is better so I am giving it 100 GB. I am also selecting SSD emulation because my Storage is using an SSD. The rest can be set to the defaults.
CPU

Microsoft requires 2 cores for Windows 11, but I will give it 4.
Memory

Microsoft requires 4 GB, but you can assign more if you choose.
Network

You can choose your preferred Bridge and set the Model to VirtIO.
After creating the VM, we will need to edit its hardware configuration before starting it.
Adding VirtIO Driver
VirtIO drivers help to give us the necessary drivers to virtualize Windows.
You can download the latest VirtIO ISO build from their Github repo.

We can edit the Hardware configuration of the VM and add the VirtIO ISO as a CD/DVD Drive.
Booting up Windows
Now that we have the VM setup, we can start up the VM.
Press a key when it asks for it. If you do not press a key, you may receive this error:
Press any key to boot from CD or DVD......
BdsDxe: failed to start Boot0001 "UEFI QEMU DUD-ROM QM00003" from PciRoot (0x0) /
Pci (0x1F,0x2)/Sata (0x1,0xFFFF,0x0): Time out
>>Start PXE over IPv4.
PXE-E16: No valid offer received.
BdsDxe: failed to load Boot0005 "UEFI PXEv4 (MAC:D2D097595EC2)" from PciRoot (0x0
)/Pci (0x1E, 0x0)/Pci (0x1.0x0)/Pci (0x12,0x0)/MAC (D2D097595EC2,0x1)/IPv4 (0.0.0.0,0x
0.DHCP.0.0.0.0.0.0.0.0.0.0.0.0): Not Found
>>Start HTTP Boot over IPv4...
If you do receive this error, you can send a CTRL + ALT + DEL command to have the VM restart. Try not to miss it this time lol.

Windows 11 Setup

If everything went well, you should be greeted with this screen.

If you do not have a product key, click I don’t have a product key. Otherwise, enter your product key.

Next, select the Windows 11 version you wish to install.

Read and accept the Microsoft Software Terms.

Now we want to make sure we select the Custom: Install Windows only (advanced) option.

We can click Load Driver to select the VirtIO drivers. Then click Browse to look for the driver.

We can select the virtio-win-x.x.xxx drive -> amd64 -> w11 folder and hit OK.

Make sure the driver is highlighted and click Next.

Select the drive available and click Next. This should start the installation and will take a few minutes depending on your system.

At this point, your VM may restart multiple times to finish the installation.
Windows Initial Configuration

You should now be greeted with this screen. You can go through and set your preferences for each.
Note: If it says that you do not have a network connection, this is fine as we will install the drivers for this later.

Once you have finished configuring the Windows 11 install to your liking, you should be greeted with this screen. We can leave this alone for a few minutes.

and Voila! We have Windows 11 installed!
Install Missing VirtIO Drivers
To finish up our Windows 11 install, we will need to install the rest of our missing drivers.

To do so, we will need to open a File Explorer (Folder icon on the task bar) and navigate to our virtio CD drive. Then, we can run the virtio-win-gt-x64.exe installer. We can leave the settings as default and click Next for each.

This alert should pop up. We can click Yes to continue the installation.

Your drivers should all be installed now and you should also now have your network connection.
Post-Install
I HIGHLY recommend creating a Snapshot/Backup/Template of your fresh Windows 11 install right now in case anything goes wrong in the future and you need to reset your VM. Best of all, you can save a LOT of time by doing so and it only takes a few clicks!
Tip: If you turn your VM into a template, you can create multiple Windows 11 VMs in Proxmox from the same template a lot faster.
Create a Snapshot

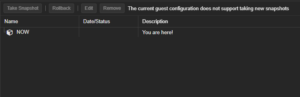
- Click on the Snapshots Tab of your Virtual Machine
- Click on Take Snapshot
- Fill in the Snapshot Prompt with a name and description of your snapshot
Create a Backup
Creating a backup is largely the same as creating a Snapshot. The downside of a backup is that it will take a lot longer and more space than a Snapshot.

- Click on the Backup Tab of your Virtual Machine
- Click on Backup Now
- Fill in the Backup Prompt with the storage location of your backup and Notes
Convert your VM into a Template

To convert your VM into a template, you need to right-click on your VM and choose the Convert to template option. This will disable you from being able to use your VM but will allow you to spin up VMs a lot faster than going through the whole process of installation again.
You will need to make sure your VM is shut down and that you delete any Snapshots that you have for the VM.
Conclusion
That’s it! You have installed Windows 11 on a VM in Proxmox. Now that you have Windows 11 virtualized in Proxmox, you can explore and run different apps on your virtual machine with more flexibility than if you ran it bare-metal. I hope this tutorial helped you. Please like and share if it did and let me know in the comments if you have any questions or if you run into any issues during your installation.
If you enjoyed this post, you should check out some of our other homelab articles.
Thanks for reading!